Table of contents
After you’ve created your MIDI, it can now be compiled with your audio.
Prerequisites
The following programs must be installed to your computer:
- FFMPEG – Link (Under Packages and Executable Files)
- .NET Desktop Runtime 8.0 – Link
- Onyx CLI (for compiling 360 and PS3 version)
FFMPEG
FFMPEG also needs to be added to your PATH environment. To do this, please follow these steps:
- Open the start menu and search for “Environment Variables”, then select “Edit the system environment variables”.
- In the System Properties window that appears, click the “Environment Variables” button.
- In the Environment Variables window, under the “System variables” section, look for the variable named “Path” and select it, then click “Edit”.
- In the Edit Environment Variable window, click “New” and then paste the full path to the directory that contains the FFmpeg executable to add to the Path.
- Click “OK” on all the windows to save the changes. You will need to restart the Toolkit for the change to take effect.
Onyx
In order to compile 360 and PS3 packages, the command line version of Onyx will need to be downloaded. Please go to the Releases page of the Onyx app on GitHub and download the latest version of the command line toolkit:

After downloading the CLI version, extract the archive anywhere on your computer. After clicking compile when selecting either Xbox 360 or PS3 as your platform, you will have the chance to select that extracted folder:
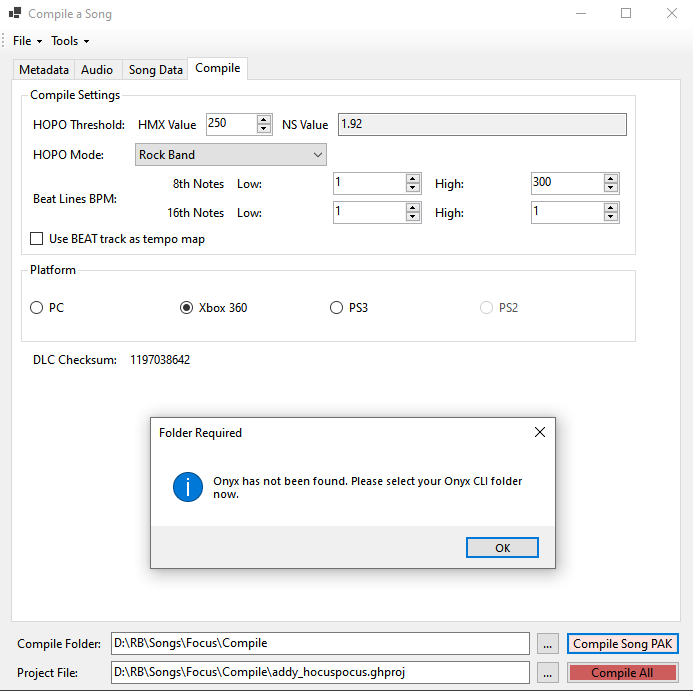
Simply select your extracted folder and you should be good to go!
Metadata
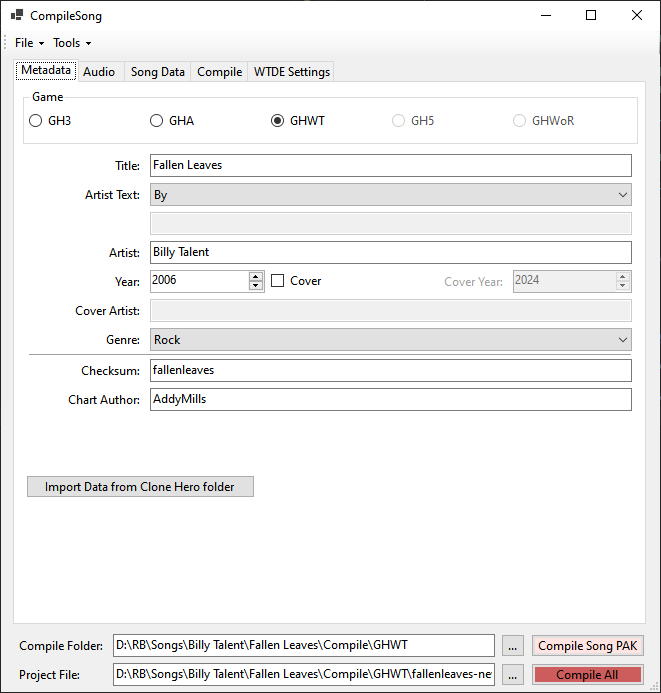
The metadata tab is used to input the song’s information you see in-game:
- Title – The song’s title
- Artist Text – The little bit of text that displays in-between the title and artist. Currently only “By” and “As Made Famous By” are included. There is also an option to add your own
- Artist – The song’s artist
- Year – The year the song was recorded
- Cover Year – The year the song was covered (check the “Cover” box to enable this field)
- Cover Artist – The artist who covered the song (check the “Cover” box to enable this field)
- Genre – The genre of the song. Not available for GH3/A
- Checksum – A string of characters representing the song in-game. This should be a word representing the song using letters and numbers. It’s usually the song title lowercase and without spaces or other special characters.
- If you do not make your own, one will be generated based on the song title
- Chart Author – The name of the person who authored this chart
If you are converting a Clone Hero song, you can import the metadata and audio file paths by clicking the “Import Data from Clone Hero” button. It will prompt you for the folder that contains the audio and MIDI files (.chart format is not yet supported). The fields that get populated depend on the game chosen (Importing a Clone Hero folder when selecting GH3 or GHA will not fill in the audio fields for GHWT, for example)
Audio
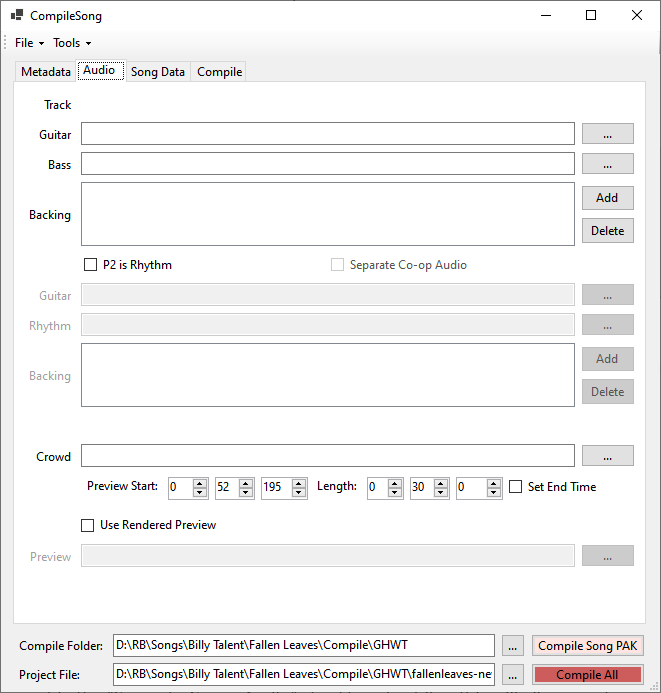
The audio tab is used to tell the compiler where all of your audio is. If you have separated tracks, you can fill them all in. You can either copy/paste the filepath, or click the button next to the input to select a file. Drag and drop is not yet supported in this version.
If you do not have audio for a particular part, leave it blank. If you do not have separate instruments at all, place your audio into the backing track.
If you do have separate audio files, you can add as many tracks as you want to the backing track list. They will all be combined into one track.
For GH3 and GHA, if your song has a Rhythm track instead of Bass, select the “P2 is Rhythm” box. This will update the program to show “Rhythm” instead and enable the “Separate Co-op Audio” checkbox. Enabling this will allow you to select separate audio for co-op mode. If you have a Rhythm part and the Guitar and Rhythm tracks are the same, this option is not needed.
The preview time lets you set the time in the audio used for the preview in the setlist. Preview Start determines where the preview starts.
You can either enter in the length of the preview as shown in the image, or you can click the “Set End Time” box and you can set the point in the song you wish the preview to end. You can switch back and forth between the two at any time, and the data is converted over.
You can also create your own preview track and add it to the project by checking the “Use Rendered Preview” button. This will not create a preview track and instead use the file provided in the “Preview” field.
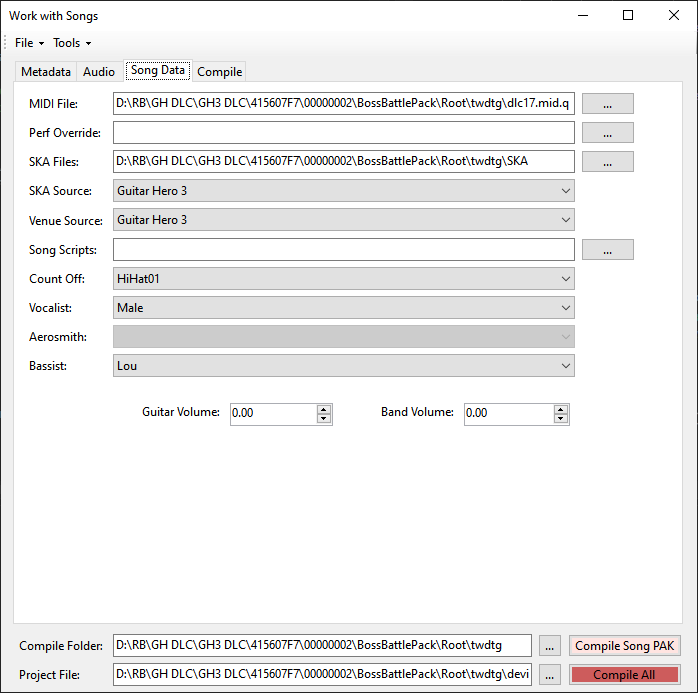
Song Data
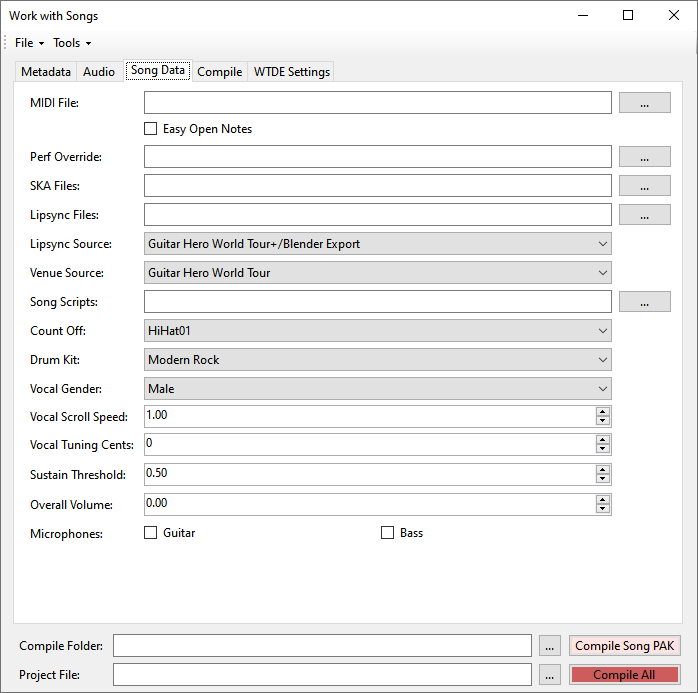
The song data tab lets you choose your game files to be included as well as set some in-game settings:
- MIDI File – The file path to your MIDI file
- Easy Open Notes – Selecting this will tell the compiler to parse the note below “Easy Green” as open notes for Easy
- Perf Override (Optional) – Provide a path to a .q file to add custom performance items into the final song PAK file (any performance entries generated due to the MIDI do not get overwritten, it only adds them)
- SKA Files (Optional) – Insert a file path to a folder containing all SKA files you wish to include in this custom.
- Venue Source – The game that lightshow and cameras were charted for. For example, if you charted a song for GH3, and want to also compile it for GHA, keep this field on GH3. It’ll convert the lights and cameras before compiling the PAK file.
- Song Script (Optional) – Provide a path to a .q file to add a custom song script file into the final song PAK file
- Count Off – The sound sample the game plays when the count-off note is encountered in the drums_notes array.
- Vocal Gender – The gender of the singer in the song. If set to None, there will not be a singer in this song.
- Volume – Adjust the volume of the guitar and backing tracks. This adjustment is made by the game itself and will not change how the compiler makes the audio. Make the value negative to decrease the volume, and positive to increase the volume.
- Be careful with increasing the volume, as this can cause clipping.
GH3/GHA Exclusive options:
- Bassist – Select a bassist for the song. Note: Characters that do not appear in the selected game will get defaulted to the default bassist.
- Aerosmith – If Steven Tyler is selected as the vocalist, this field becomes active and will allow you to select the outfits for the Aerosmith avatars
GHWT+ Exclusive Options:
- Lipsync Files (Optional) – Insert a file path to a folder containing all lipsync SKA files. This option only needs to be used if you have SKA files from GH3 or GHA and are converting them. If this is not your situation, all lipsync SKA files can be placed with the rest of the SKA files
- Lipsync Source – The game that the lipsync SKA files are made for. You should only change it if you are using SKA files from GH3 or GHA in another custom.
- Drum Kit: The samples that play when you hit the drums during freestyle sections in-game
- Vocal Scroll Speed: The speed at which the vocals chart plays. 1 is default.
- Vocal Tuning Cents: Adjust the pitch of the notes for vocals. If the song is not in a perfect pitched tuning, this number can be adjusted to accommodate. Range is from -50 to +50. If you feel you need to go beyond this range, please ensure the vocals notes are properly charted.
- Sustain Threshold: The threshold at which sustains start appearing. The number is the percentage of a quarter note. Default is 0.50, meaning that any note longer than 1/8th (50% of ¼) will become a sustain.
- The default value for GH5 and up is 0.45.
- Microphones: Enable the use of a microphone for the guitarist/bassist in-game (will still require a script call in the song’s performance array to make them show up)
Compile

The compile tab has a few compiler settings and is used to compile the song.
- HOPO threshold – The distance between two notes to make them a hammer-on/pull-off (HOPO). This compiler uses the Harmonix values for its calculations. Default is 170 and that means any note faster than an 8th note triplet (1/12th note) will become a HOPO.
- NS Value – If converting an official chart file, you can use this to set the HOPO threshold to its original value.
- HOPO Mode – The mode to use for Hammer Ons and Pull Offs. Each mode changes the logic of compilation slightly. Rock Band mode is the only functioning one at this time. Rock Band mode should be the default for most MIDIs you find or make, but if you are converting a song, it may be useful to change this setting.
- Rock Band – This mode will calculate HOPOs based on the distance between each note, and then apply forcings, either on or off. If a chord and a single note follows containing any note of the chord and it’s within the HOPO threshold, this will NOT be a HOPO unless forced.
- Moonscraper – This mode will calculate HOPOs based on the distance between each note, and then apply forcings, either on or off. If a chord and a single note follows containing any note of the chord and it’s within the HOPO threshold, this will be a HOPO unless forced off.
- Guitar Hero 3 – This mode will calculate HOPOs based on the distance between each note. If a “force on” note exists on a note in the MIDI, it swaps the HOPO status. If a chord and a single note follows containing the lowest note of the chord, this will be a HOPO unless swapped. “Force off” notes are ignored.
- Guitar Hero World Tour+ – This mode will NOT calculate HOPOs based on the distance between each note. Only notes that are forced on will become HOPOs.
- Beat Lines BPM – The tempo at which subdivisions of beat lines appear. Not supported for GH3. If these fields are disabled, they can be enabled in Settings.
- Platform – Choose which platform to compile for here. If compiling for 360 or PS3, the checksum that will be used will be shown as well.
WTDE Settings
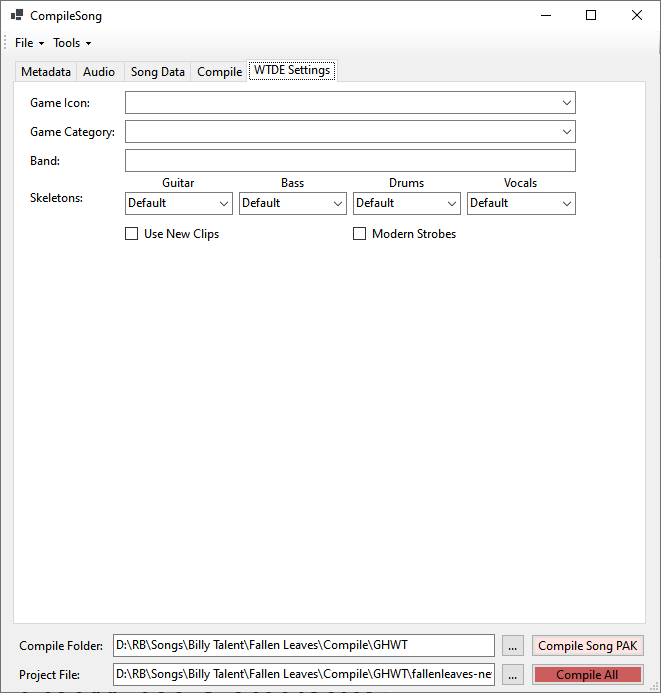
This tab is only available when GHWT PC is selected and contains settings that only apply to WTDE:
- Game Icon: The icon that shows up next to the song in the setlist
- Game Category: The category that the song is sorted in when viewing the setlist
- Band: The QB key of the band configuration you’d like to apply for the song
- Skeletons: The skeletons to apply for each band member
- Use New Clips: Turn on to allow multiple clips playing at the same time in a song
- Modern Strobes: Turn on to enable GH5 and up logic for strobe lights in-game
WoR Settings

Currently, the only settings exclsuive to WoR are the tiers. Upon compiling, if found that there are no notes for a particular part, the tier will be set to 0.
How to Compile
After filling in all the tabs, hit Compile All. This will prompt you to save the project file. If this is your first compilation ever for GH3/A on PC, the program should also backup your qb.pak and qb.pab files. A message box should show up telling you this. You can restore your backups by going to the Toolkit folder. There will be a Backups folder containing them.
The toolkit should be compatible with any GHTCP modifications done to it. However, once you add a song with my toolkit, GHTCP will not let you access the game’s files anymore until you restore the backup.
To redo a chart, you can simple click “Compile Song” and it’ll just recreate the song PAK file. This button is disabled for compiling to a console and only “Compile All” is available for them.
When using “Compile All”, the button text will change to “Compiling…” when it is busy compiling the audio. Do not close the program at this time.
PlayStation 2 Compilation
Guitar Hero compilation for PS2 is very similar to compiling to other consoles. However, it comes with a few restrictions:
- Only the lead singer can be animated
- There is a size limit of 1,441,792 bytes for the chart and all SKA files together
DLC Conversion
One thing I wanted to add was the ability to convert DLC from GH3 and make them work on Guitar Hero III on PS2 without re-compiling it charts. Therefore, I added the ability to now load .q files as a “MIDI File”.
Using Honeycomb, extract any dlc song’s PAK file using the PAK Tools option. For this example, I’ll be using The Devil Went Down to Georgia (which is dlc17):
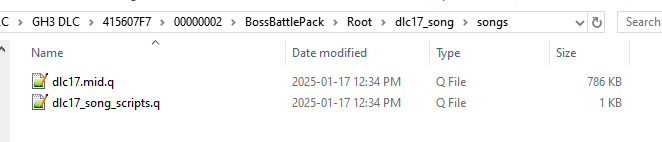
Make sure to grab the SKA files as well in folder above and place them in their own folder:
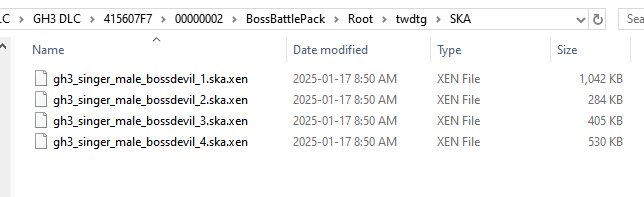
Use the “.mid.q” file as your MIDI file in the compiler and locate your SKA files for the lipsync animation. Be sure to also set your SKA Source to Guitar Hero 3:
One other thing you’ll need are the setlist entries for the DLC. In the DLC files, find the PAK file that ends in “_text” and extract it. Locate the only file that doesn’t say “dlc” in its name:
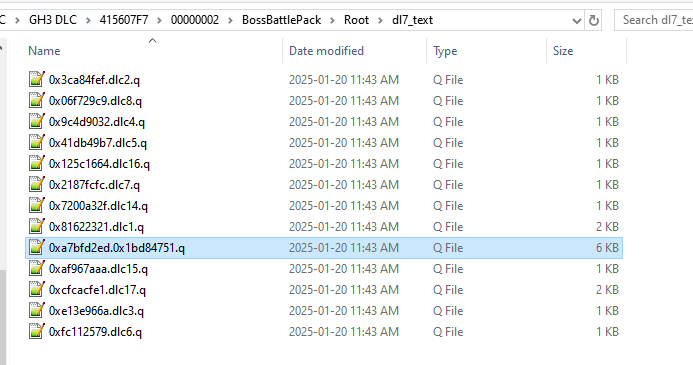
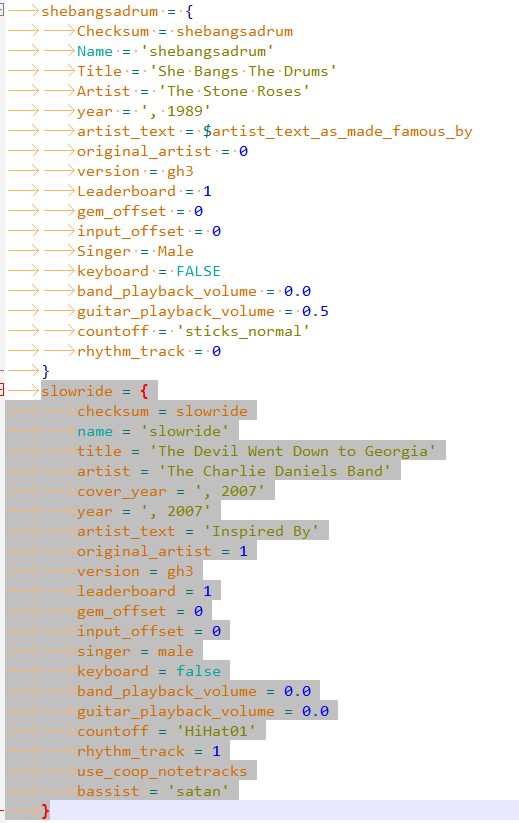
This is the setlist entry file and defines all DLC. Locate your dlc song (TDWDTG is dlc17 in this case), and copy the entry starting with “dlc17 =”
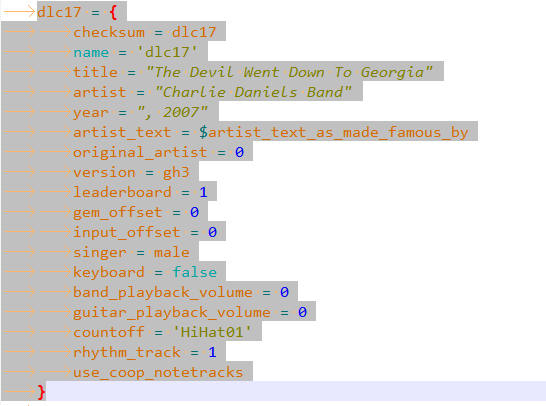
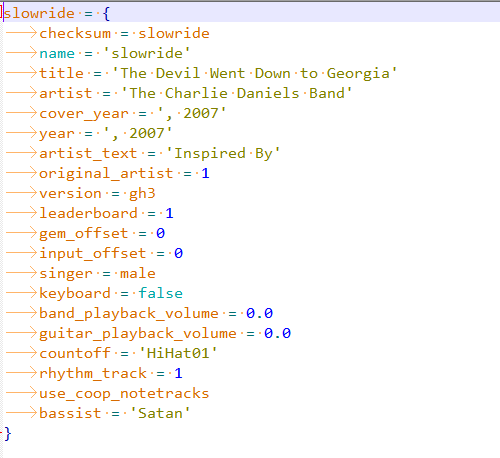
Once you finish compiling, copy this text into the setlist.q file that gets generated, making sure to replace “dlc17” with the shortname you chose. If you’re replacing “Slow Ride” like I am for this example, change them all to “slowride”:
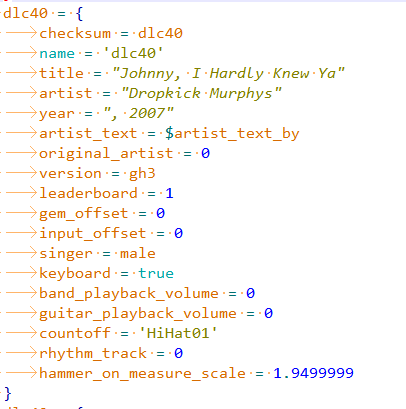
This ensures that the conversion is proper. Later DLCs such as “Johnny, I Hardly Knew Ya” change the hammer-on threshold, so it’s important that all data is copied properly:
After this, make sure you also copy the “dlc17” file in the _text folder to your songs folder in the qb file to ensure that sections work properly!
For a video of how this looks, please see the below YouTube video:
SKA Files
The compiler will automatically convert SKA files to the PS2 format, these files are significantly smaller than their HD console counterparts due to fewer bones being present:

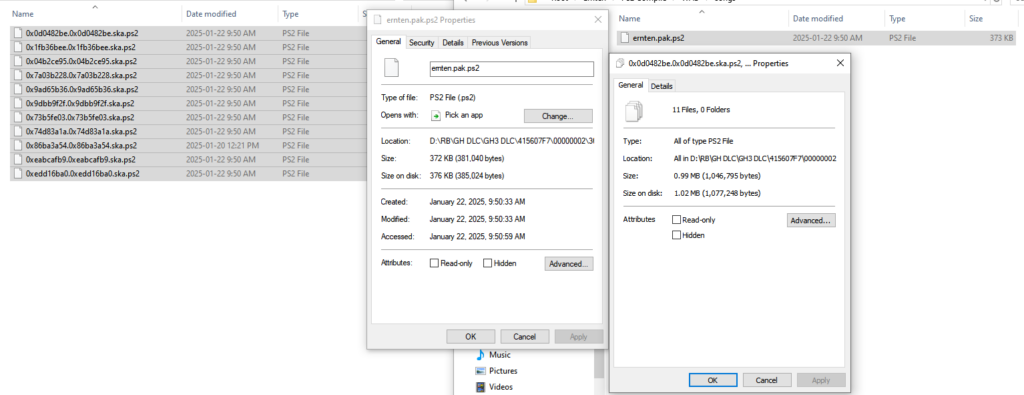
However, should you find that after compiling the chart + SKA files still exceed 1,441,792 bytes, like if you were to convert “Ernten was wir saen”:
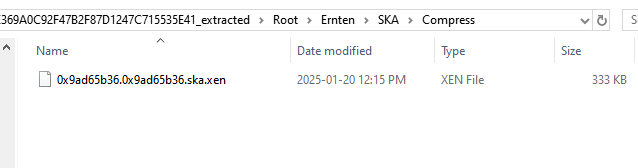
You can opt to add a folder called “Compress” in your SKA input folder and place files in there to remove some animation data:
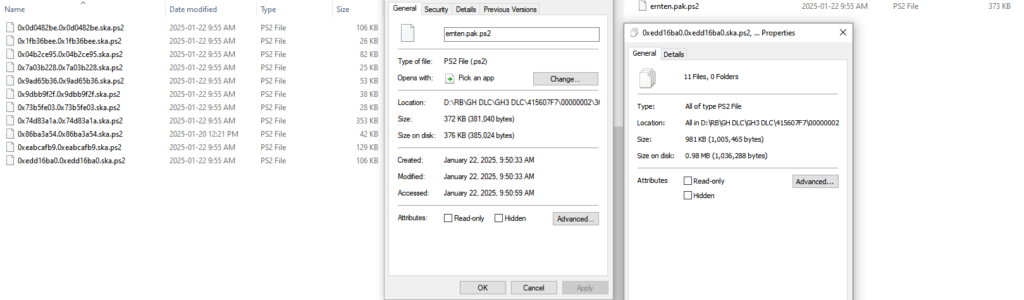
What the compiler will do is for any SKA file found in that folder, remove every other frame so that it plays at 15fps instead of 30fps. This won’t change the animation in-game too much due to how keyframing works, but will allow you to keep all animations that way.
Post Compile
Once compilation is finished, a “PS2 Compile” folder appears where you told the compiler to save. This folder contains everything you need to play your custom!
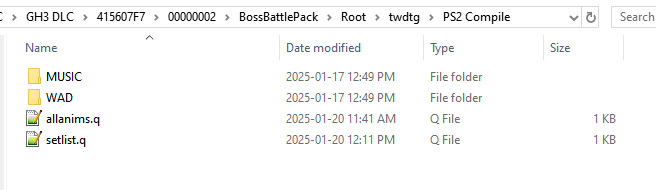
The MUSIC folder can be copied straight to the root of your disc. The filename will already be created for you.
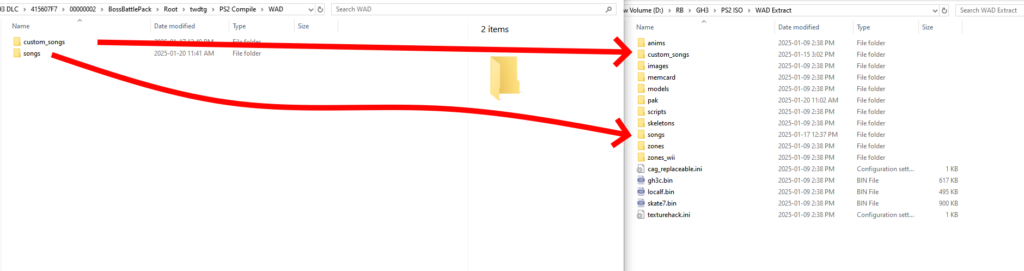
The WAD folder needs to be added to your extracted WAD folder. For more information, please consult this page for a brief overview of Honeycomb to do that. Go into the WAD folder, and copy the two folders inside directly to the root of your extracted folder:
The two q files need to be added to .q files inside the qb.pak file inside the pak folder of the extracted WAD.
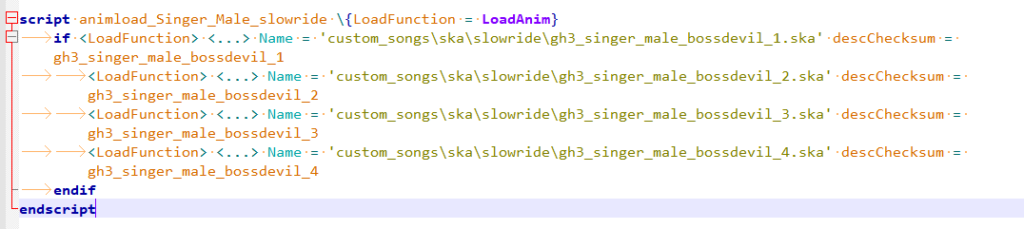
“allanims.q” needs to be added “scripts\allanims.q”. If you are replacing a song, look for that song’s shortname and replace that script with the script found in the PS2 compile folder:
If you are adding a song to the setlist, you can simply copy/paste the contents into allanims.q and you do not need to replace any text.
setlist.q get placed in “scripts\guitar\songlist.q”. If you are adding a song, palce the data as another entry in the “permanent_songlist_props” struct. If you are replacing a song, look for the song in that structure, and replace all the data:
And you’re done! Now recreate the qb.pak file with Honeycomb, and then recreate the WAD file after that. Place them on your custom disc and the song is ready to play!
Performance/Scripts Override
The toolkit allows you to override (or add, in the case of performance) custom scripts via these two fields in the Song Data tab. Please download the templates here.
This section of the page will give you information on how to compile them properly.
Performance Override
Treat this file as a nameless performance array. You can create a file with just the struct entries and the compiler will be smart enough to wrap it in the song_performance array. As an example:

You can see that there is no qb key signalling the name of the array, nor are there array braces.
Items do not need to be in order, the compiler will sort it for you. Keep in mind that Band_PlayFacialAnim can also be added via MIDI by including it in the MIDI track of the avatar (please see the authoring guide here)
Scripts Override
This file allows you to place any song-specific scripts and have the song use them. This file also contains which loops the avatars play in-game. The template above contains male and female examples:
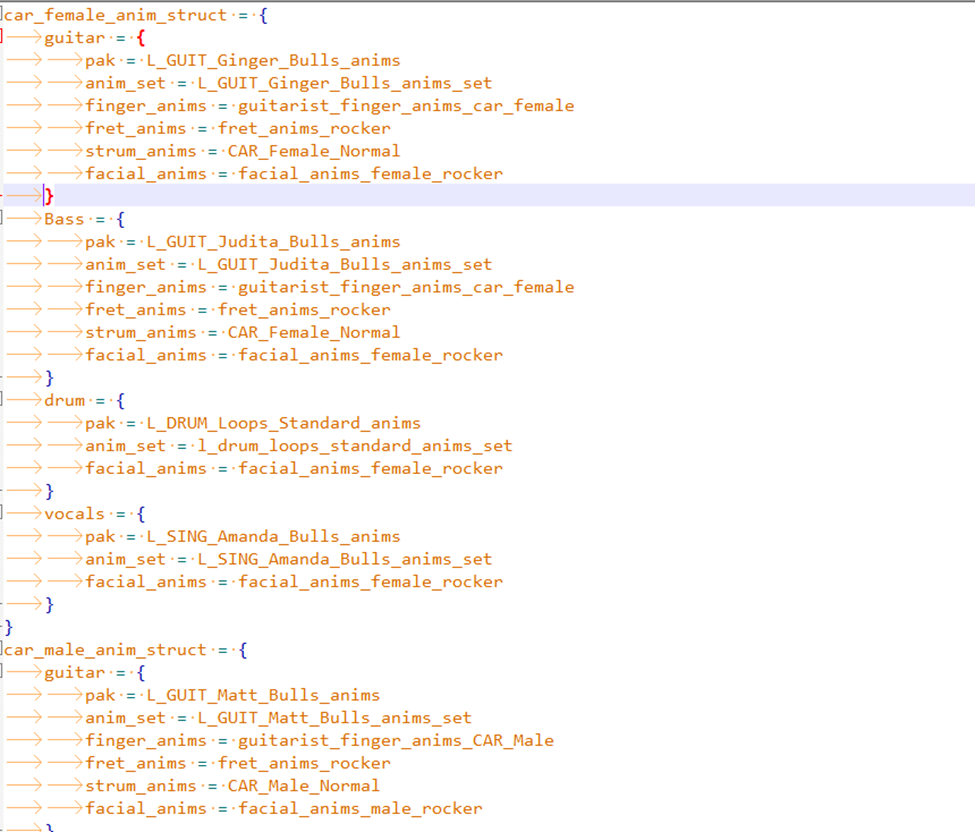
If you keep the names as “car_female_anim_struct” and “car_male_anim_struct”, the compiler will change them to work with the song automatically by adding the songname to these names.
If you need to add “_alt” structures for guitar-playing singers, you will need the full name of the qb key in that instance.
Importing Songs
As of the May 2024 build, you can now import songs using SGH files. Originally introduced with Guitar Hero Three Control Panel, these new SGH files allow you to share songs and convert them to any platform without reprocessing any audio
To get started, click on the “Import SGH Archive” button in the main screen of the toolkit:
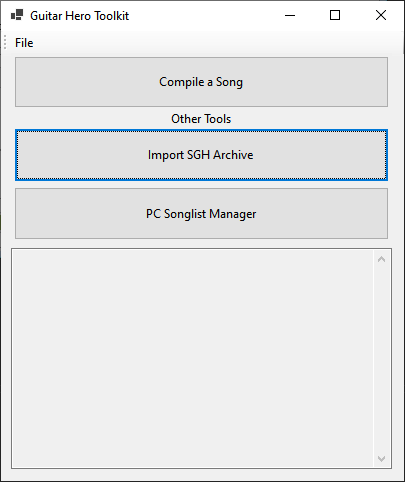
Once loaded, you are greeted with this window:
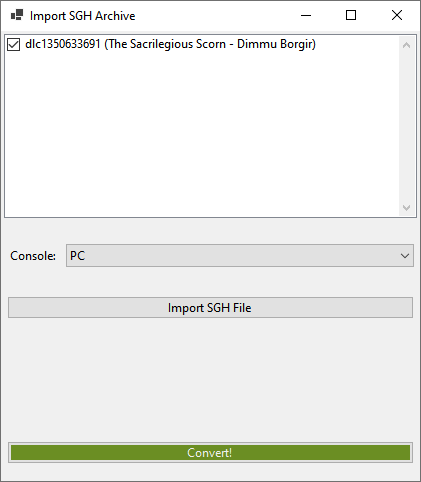
Click on “Import SGH File” to choose any SGH file, both from GHTCP, or the new SGH files created by this toolkit (more on exporting later).
The songs inside the SGH file will show up in the list. By default, all songs checked. Any song that is checked will be included when you hit “Convert!”
For 360 and PS3, you must have Onyx set up (please see the Onyx section above), the program will guide you through the setup if it’s not configured. For these consoles, the LIVE or PKG file will show up in the same folder as the SGH file.
For PC, the songs will be added to GH3 automatically.
If there are a lot of songs in the SGH file, it may take some time to process. Please be patient if the program appears unresponsive.
Exporting Songs
A new feature in the song compiler is the ability to export songs to an SGH file to import with this toolkit. It can be found in the File toolbar menu:
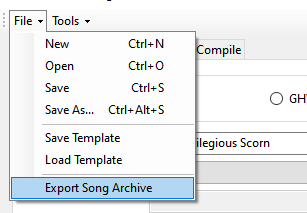
This will go through the process of compiling your midi file and audio and create an SGH file in your compile folder (by default, this is the folder where your .ghproj file is located in). Once created it can be shared so others may play your customs as well!
Exporting currently only works for Guitar Hero 3.